Tag Archives: permit process

Second Story Addition Timeline: What to Expect

Revolutionize Your Interiors with High-Quality Skylights in Benicia, CA

Key Takeaways

  • Know your home’s structural limitations and have a foundation inspection before adding a second story.
  • Work closely with architects, engineers, and local authorities to synchronize design, permitting, and regulatory concerns, thereby reducing the risk of expensive delays.
  • Build out a project timeline and budget that includes all phases — design, permitting, construction, system upgrades, etc. — and always set aside a contingency fund for unexpected hurdles.
  • Track and adjust for the usual suspects that tend to push projects out past their original timelines — weather, inspections, material shortages, and last-minute design adjustments — by staying in constant communication with stakeholders.
  • Wind down your house for the blow by arranging living accommodations, cultivating expectations for daily life, and creating routines to assuage disruption and keep you sane.
  • Aim for style consistency, mechanical updates, and resale value to maximize long-term rewards, and nurture open-communication bonds with contractors to guarantee a good project result.

A typical second-story addition timeline is about 4 to 8 months from planning to completion. Most projects begin with a design phase, which requires plans and permits that can take a few weeks to a few months, depending on local regulations. Work on the site begins immediately once builders get permits for structural work and framing. After that, crews work on roofing, windows, and exterior walls. Interior work — wiring, pipes, insulation, walls — can span weeks. Final steps, like painting and finishing work, complete the schedule. Weather, rules, and plan changes may adjust the timeline. Planning keeps us on track. The following sections separate each step for easier planning.

The Hidden Backbone Beneath Your Home

The unseen foundation is the backbone of any second-story addition. Its condition, strength, and suitability determine if a home can handle another floor above. Often, homes with a wide single-level footprint—like ranch-style houses—depend more on this hidden base since building up may be the only way to expand within property lines. Ignoring the foundation’s limits risks both safety and longevity, making a thorough evaluation not just smart but essential.

Structural Reality

A good evaluation begins with the existing home’s capacity to support additional load. Contractors and engineers should inspect the foundation, walls, and roof for cracks, settling, or previous stress. They seek signs of whether the foundation can support the new weight without moving or breaking. At times, these findings reveal that deep reinforcements or even a complete tear-out of the foundation are necessary before new construction can start.


Collaboration with structural engineers is key. Their inspections help identify hazards before they happen — like vulnerabilities in support beams, undersized footings, or materials that don’t meet modern standards. These professionals can advise on targeted reinforcements, such as installing steel beams or underpinning the foundation, to bring the building up to code.


Shifts in the foundation or frame typically necessitate modifications to the building’s architectural plan. This could involve moving walls, changing room configurations, or redesigning stair locations. Each revision can affect both the schedule and the price.


Local codes still tend to mandate inspection at every phase, from the original to post-reinforcement. If you miss a step or your standards are too high, it can slow down the project or stop it altogether.

Understanding Zoning Rules

Zoning laws determine what you can construct and where. They specify building height maxima, minimum setbacks from property lines, and occasionally even style guides. Before making plans, check these rules to prevent expensive re-designs down the road.


If the addition extends outside of local limits — say by adding height that exceeds the neighborhood’s limit — a variance request has to be submitted. This can take weeks to months and might not always be successful.


Following these local rules is not just legal. It keeps the community happy, maintains good neighborly relations, and makes permits more likely to be approved.

Financial Stress-Test

Budgeting a second-story addition takes more than materials and labor — you need a full view of all the costs. Permits, ongoing inspections, tie-ins, and rebar work, and even temporary relocation costs should be built into the plan. Almost any homeowner will tell you that foundation upgrades, while often inevitable, are not immediately apparent, major expenses.


Wise to get quotes from multiple contractors. It aids in identifying outliers and guarantees that price and quality both conform to the market.


Surprise expenses nearly always materialize. Reserving a contingency fund on the order of 10-20% of your overall budget will keep the project rolling should surprises arise, like undiscovered foundation issues or supply delays.

velux-gallery-living-room-101

Your Second Story Addition Timeline

Your second-story addition timeline. Thoughtful scheduling, frequent communication, and regular monitoring are essential to maintaining forward momentum. Here are the main phases to expect:


  • Design phase: architectural planning, engineering, and revisions
  • Permitting phase: documentation, reviews, and approvals
  • Pre-construction phase: contracting, site prep, and logistics
  • Construction phase: demolition, framing, utilities, and finishes
  • Final phase: inspections, move-in, and final review

1. The Design Phase (1-4 Months)

Design is the wildest, but most unpredictable stage. It can take as long as three months to get your architectural plans and engineering drawings. Collaborate with architects to custom-design your new second story for a perfect fit to your style and practical needs. Think about a few different styles–modern, traditional, or something regional–that go nicely with the rest of the house. Go over preliminary sketches and blueprints. Anticipate that they’ll want to provide feedback and ask for changes, which can extend the timeline. Each revision can add weeks, particularly if engineering reconfiguration is required to support the structure.

2. The Permitting Phase (1-6+ Months)

Permit timelines are unknown and vary according to local regulations. Get all your paperwork: structural plans, site maps, surveys – squared away early to ensure nothing slips through the cracks. Schedule inspections early, because they get booked up and delayed a lot, especially in the city. Some areas permit within a month, others require half a year. Here’s how to monitor your permit status, either online or by calling the building department directly. This way, you catch any errant paperwork or additional information requests.

3. The Pre-Construction Phase (2-4 Weeks)

Contract agreements and a thorough scope of work must precede construction. Take a walkthrough with your contractor to identify any last-minute changes. Coordinate materials deliveries and site access for crews. Be certain all permits are in hand before proceeding. If you can, plan to move living/work spaces to avoid interference during the build.

4. The Construction Phase (4-8 Months)

This step consumes the most time and consists of demolition, foundation work, framing, and utilities. Contractors have to beef up your foundation for new loads. Roofing and insulation to keep the temperatures in check and conserve energy. Issues will arise—weather setbacks, material shortages, or emergency fixes. Check in with your builder frequently and address problems immediately. Costs are steep, from $500 to $800 per square foot, so reserve a surprise fund.

5. The Final Phase (2-4 Weeks)

Inspections are coming so that they can make their new addition safe. Finishes, such as painting, flooring, and fixtures, add polish to your new space. Arrange furniture, moving, and daily life setup. When finished, debrief the experience with your crew and rejoice in the new chapter.

What Delays The Timeline?

Second-story additions are major projects with many moving parts, and timelines can easily shift. From weather and permits to design changes, here are common factors that can slow progress. Here are common factors that cause delays:


  • Weather disruptions
  • Inspection schedules and permitting
  • Material shortages or errors
  • Changes in design or plans
  • Unforeseen structural issues
  • Project size and complexity
  • Planning and design missteps

Weather

Weather can delay exterior work, such as framing or roofing. Even if well scheduled, rain or snow in the winter can make it dangerous and drag out the crew. Storms tend to tear at materials and workmanship, thus requiring tarps or covers. In certain climates, elevated humidity or heat can impact drying times for concrete and paint. Project managers must track forecasts and plan additional days for inclement weather. For instance, the wet season in wet season areas might halt construction for weeks at a time, delaying timelines.

Inspections

There are delays when inspections aren’t scheduled early or when paperwork is missing. Every phase, be it electrical or plumbing, has to ace an inspection before the next phase begins. If inspectors are tied up or you don’t have clear requirements, work can come to a halt for days or weeks. Tight code towns or cities can have longer approval waits. It’s good record-keeping and early communication with inspectors that can minimize these delays. For example, some locations require separate electrical, mechanical, or zoning permits, and errors or omissions in paperwork can delay things even more.

Materials

Material shortages are a common source of slowdowns. If things like steel beams or custom windows are delayed or backordered, work stops until they are delivered. Cultivating good relationships with vendors may assist, but occasionally replacements are necessary. Order errors—such as ordering the incorrect size or type—add additional expenses and slowdowns, particularly for custom or imported materials. Monitoring your stock tightly will prevent you from being caught short in the middle of an assignment.

Changes

Design or plan changes almost always mean more time. Even minor adjustments can translate into new designs, additional approvals, or re-done work. Major modifications, such as converting a garage into an ADU, can lengthen a timeline by months. They want all modifications accounted for and justified, so they’re aware of how the budget and timeline move. The less crapscrambling at the end, the more elegant the build.

Managing Your Life During Construction

A second-story addition is a significant investment, typically requiring four to six months to complete. Enter construction, with all its daily disruptions, noise, and adjustments to routines. The construction could impact plumbing, electrical, and heating or cooling systems as crews connect new areas to existing systems. Homeowners, be prepared for permits, temporary living adjustments, and continuous lifestyle shifts.

The Move-Out Question

Remaining during a build/move-out is a large decision. If you have little kids, sedentary pets, or work at home, the dust and noise may be overwhelming. A temporary move—perhaps with friends or elsewhere on rent—can equate to greater comfort and security, but can inject additional costs and stress. Staying allows you to monitor progress, but anticipate disruption and diminished privacy.


Consider your routines. If you require silence to work or study, or your family has health requirements, moving may be optimal. If you remain, attempt to maintain your essential schedules, such as dining and sleeping, as consistently as possible. Make sure you’re explicit with the contractor about your decision so they can plan work hours and access to your home.

Protecting Your Sanity

Establish ground rules with the crew early—come to terms on work hours, entry, and which rooms are off-limits. This maintains boundaries, particularly if you remain. Have a quiet retreat for rest, reading, or working, away from noise and dust if possible. Even a tiny room or screened-off area of your house does the trick.


Seek Stress Relief. Deep breathing, walks, or a hobby can help. Check in on the project every now and then and see the progress for yourself. It makes you feel like you’re managing your life, even when it’s chaotic.

Communication is Key

Clear, consistent communication with your contractor is essential. Schedule regular check-ins—typically once a week—to review progress and upcoming work. Keep a simple log of calls, emails, and agreements to provide clarity if questions or disputes come up later.


Get your family’s input and update. This keeps everyone involved and less annoyed. A little communication goes a long way — good communication can make a long build much more bearable.

The Impact on Your Home

A second-story addition is more than simply expanding your space. It transforms how your home looks, feels, and functions. The renovation experience carries with it an array of advantages, yet calls for strategic preparation of both immediate disruption and sustained worth. Before moving into the technical details, consider these core advantages:


  1. More livable square footage without shrinking your yard or exterior amenities.
  2. More privacy, with bedrooms or offices away from the main floor.
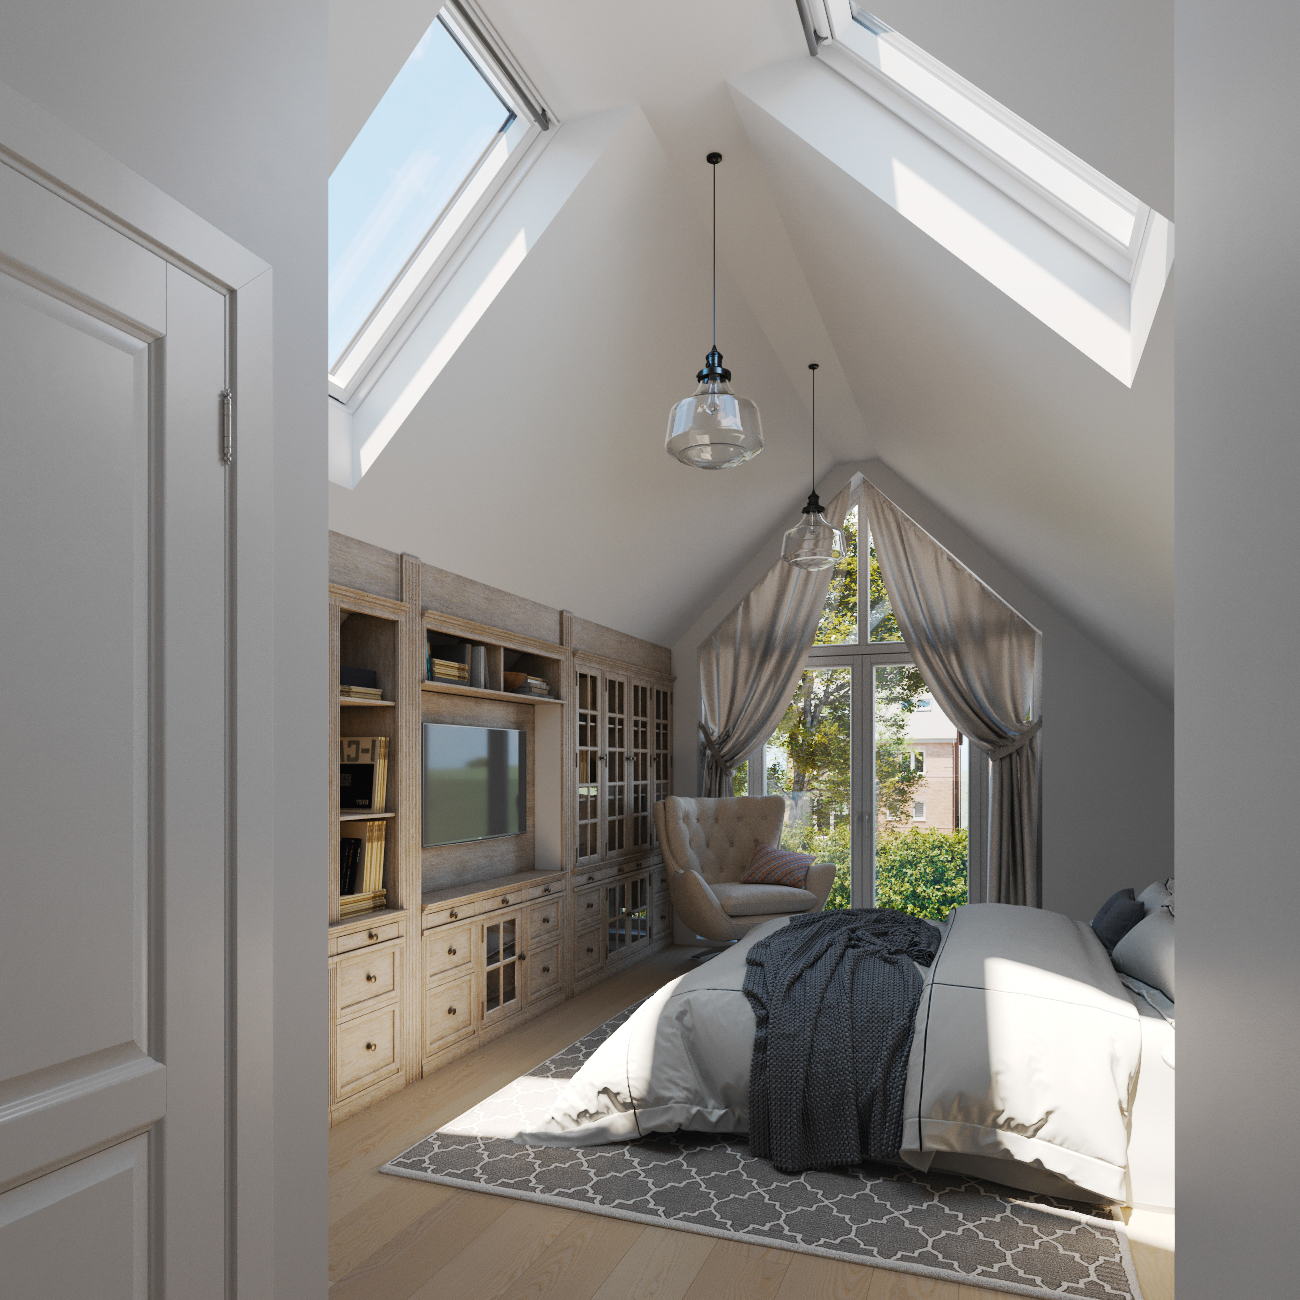
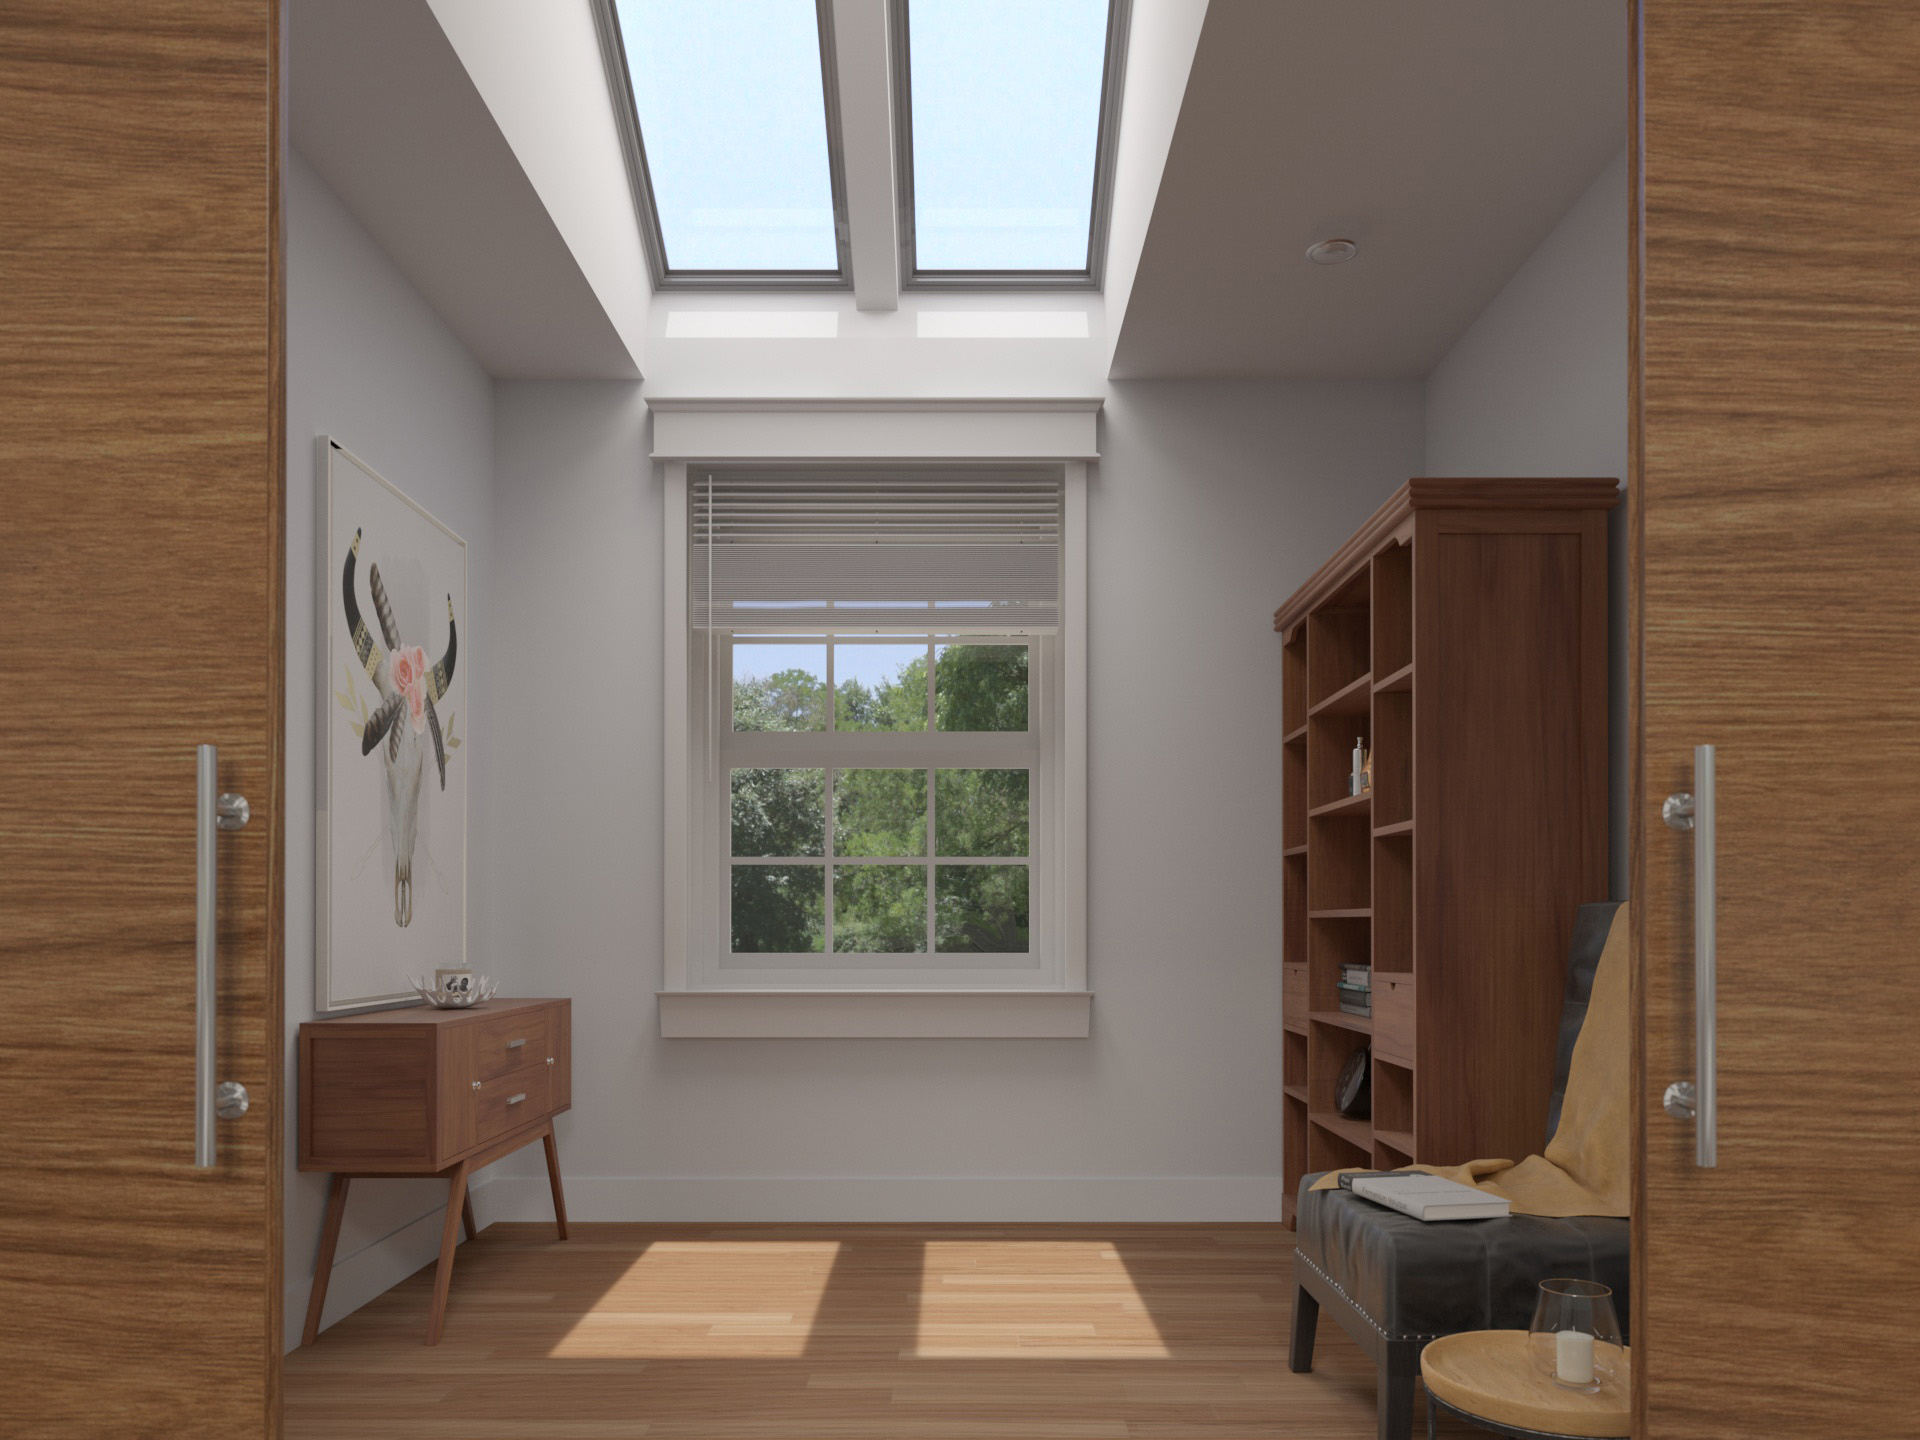
  3. Opportunity to capture better views and natural light in your upper-floor rooms.
  4. More energy efficient, assuming the new floor is well-insulated.
  5. Capacity to modify older systems and layouts to conform to contemporary demands.

System Upgrades

System

Upgrade Needed

Why It Matters

Plumbing

Larger pipes, added fixtures

Supports more bathrooms, prevents pressure problems

Electrical

Increased circuit load, rewiring

Handles more outlets, lights, and appliances

HVAC

Bigger or zoned units

Keeps temperature even, improves comfort


A second story creates additional load on every system. Pipes may have to be bigger and redirected. Your breaker box, wiring, and outlets might require an update. An HVAC evaluation usually reveals that you require a more powerful or zoned system, as upstairs rooms warm quickly. Work with licensed pros who can verify if your existing configuration is still up to code and can support the additional burden.


Budget for these upgrades upfront. They push up the ultimate cost, but ignoring them invites problems down the road. Attempt to coordinate system work with the primary build to save time and minimize your home from being a work site.

Aesthetic Harmony

It should have the ripple effect of making your home feel like you’ve lived there forever. The ripple effect on your home. Use the same roof shape, window style, and exterior finish as the ground floor. Select complementary paint, siding, and trim.


Consider your street view. Perhaps you’ll have to renovate the front steps, plant new flowers, or expand the walkway to accommodate the larger house. Within, maintain the layout easily—stairs, doorways, and rooms must flow in a logical way that makes sense and feels natural. Try not to have any abrupt floor level changes or strange room geometries.


One long-term tip: Keep a file of the design choices and materials. That comes in handy if you ever need repairs or want to sell.

Resale Value

In most markets, a second-story addition increases resale value since buyers desire additional bedrooms and updated spaces. Check out the local homes to discover what upgrades are worth the most—additional bathrooms, walk-in closets, or offices tend to be huge selling features.


When you go to list your own home, emphasize the extra living space and energy savings. Buyers see new systems and updated layouts. Save all permits, plans, and receipts. Displaying these to prospective buyers engenders trust and demonstrates that the work is premium.


They need to comply with local regulations. In certain cities, you require special permits, particularly for historic houses or custom designs.

A Builder’s Perspective

Second-story additions are highly organic projects formed by technical requirements, client objectives, and shifting site realities. This process requires careful evaluation, hard planning, and strong collaboration to get to the finish line. Below is a table outlining common challenges faced during these projects:


Challenge

Explanation

Foundation Assessment

Ensuring the existing foundation can support the added weight.

Structural Engineering

Engaging engineers to certify safety and compliance.

Budget Overruns

Unforeseen site conditions are pushing costs beyond initial estimates.

Size Restrictions

Local zoning codes limit height, area, or design flexibility.

Team Coordination

Delays from miscommunication or a lack of skilled workers.

Permitting Delays

Slow approvals from municipal authorities.

Realistic Expectations

Establishing a realistic schedule and budget provides the foundation for any renovation. Builders emphasize a holistic inspection of your home’s foundation — because if you skip this, the whole endeavor is in jeopardy. A firm foundation budget, but builders demand stuffing a 10-20% contingency buffer for surprises like hidden damage or permitting delays.


Things will change, unexpectedly. Even with a plan in hand, size limitations or engineering constraints might interfere with your dream design. Builders suggest having candid, upfront discussions about possible obstacles. This helps temper expectations and brace everyone for bumps along the way. A willingness to be flexible results in less stress when plans must change and helps keep the project flowing.


Viewing the remodel as an opportunity to grow enriches the process. Every obstacle addressed, a path towards an improved, more livable home.

The Value of Trust

Trust between the homeowner and the contractor is the heart of a smooth project. Builders promote open, frequent discussions—weekly check-ins work great—to discuss progress and finalize decisions. Trusting in your builder’s craftsmanship is essential, particularly when confronted with difficult judgments about architecture or aesthetics.


It’s important to hire a contractor who has a track record. Reputation is a proxy for trust, and a trustworthy crew in the beginning spares pain at the end. As a builder, I’ve learned that clients who communicate their aspirations and concerns upfront create the most robust relationships.


Open, candid communication facilitates establishing expectations and ironing out miscommunications before they become issues.

After the Plans

A second story unlocks new possibilities for reworking the floor plan. Builders witness homeowners utilizing bump-outs to divide living spaces, create extra bedrooms, or even carve out secluded home offices. Clever design decisions, such as open plans or integrated storage, help make additional space more functional.


Flexibility is key. Families expand, schedules evolve, requirements transform. Builders recommend designing rooms that transform, so today’s playroom turns into tomorrow’s study/guest suite.


Keep the entire home in mind at all times. They need to come from additions that are consistent style-wise and vision-wise in the long term.

Conclusion

Time lines move quickly. Crews arrive, tools strike wood, walls go up, and your house transforms week by week. Delays arise from weather, ancient pipes, or lagging permits. Good builders communicate and address issues in person. Well-defined plans and excellent teams assist you in maintaining control. You experience dust and noise, but new space and light. Life has to bend, but most people discover a new rhythm. A lot of families take advantage of this period to sort stuff or make older rooms function better. Looking to prepare for your build? Request early. Converse with neighbors. Check out builder reviews. Connect for insider advice and authentic experiences from others who’ve made it happen.

Frequently Asked Questions

1. How long does a second-story addition usually take?

A second-story addition goes on for 4-9 months. Your timeline is contingent on size, design, weather, and the approval process.

2. What factors can delay my second-story addition project?

Delays tend to arise from permit approvals, weather, material shortages, and unanticipated structural problems. Collaborating with a seasoned builder can minimize delays.

3. Will I need to move out during construction?

Most homeowners remain through construction but anticipate noise and dust. For peace of mind, a few opt for temporary housing, particularly when demolition is extensive.

4. How can I prepare my home for a second-story addition?

Empty out spaces beneath the proposed addition and stash valuables. Talk safety and access with your builder pre-start.

5. How do second-story additions affect daily life?

Anticipate disruptions in routine, restricted access to certain rooms, and additional dust. A little planning with your builder can go a long way toward minimizing the disruption.

6. What is the first step in adding a second story to my home?

Begin with a consultation from a competent architect or builder. They will evaluate your home’s framing and assist you in designing the project.

7. Are second-story additions worth the investment?

Yes, a second-story addition enhances the living area and can add value to your home. It is often cheaper than relocating to a bigger home.

Your Dream Second Story & Primary Suite Built by Mares & Dow Construction & Skylights – Let’s Create the Extra Space You’ve Been Dreaming Of

Unlock your home’s full potential with a custom second story or primary suite addition from Mares & Dow Construction & Skylights. With over 40 years of experience, we specialize in high-quality expansions that blend seamlessly with your home’s existing structure and lifestyle needs.

Whether you’re looking to add a luxurious primary suite, expand upwards with a second story, or enhance your living space in other ways, we customize each project to suit your vision, your home’s architecture, and your long-term goals.

Key benefits of our second story & primary suite services include:
• Expanding your living space to accommodate growing families or additional functionality
• Boosting your property’s value with expert design and construction
• Creating energy-efficient, stylish living areas designed around your needs

Proudly serving Contra Costa County—including Alamo, Danville, Orinda, Martinez, and San Ramon—Mares & Dow Construction & Skylights is your trusted partner for functional, beautiful, and lasting home expansions.

Contact Mares & Dow Construction & Skylights today for a free, no-obligation quote and let’s build the second story or primary suite of your dreams!

Disclaimer

The materials available on this website are for informational and educational purposes only and are not intended to provide construction, legal, or professional advice. You should consult with a qualified general contractor or industry professional for advice concerning any specific construction project, remodeling plan, or structural concern. Do not act or refrain from acting based on any content included on this site without seeking appropriate professional guidance. The information presented on this website may not reflect the most current building codes, regulations, or industry best practices. No action should be taken in reliance on the information on this website. We disclaim all liability for actions taken or not taken based on any or all of the contents of this site to the fullest extent permitted by law.

Do You Need A Permit For A Garage Conversion?

Key Takeaways

  • You should have a permit for your garage conversion to abide by local regulations and to make certain that everything is done up to code with rigorous safety guidelines.
  • Getting the right permits ensures your home insurance stays protected and you won’t get stuck in expensive liability or coverage fights later.
  • A permitted conversion enhances your property’s value, boosts marketability, and stops problems at resale or inspection.
  • Careful planning, such as local code research and design assistance from professionals, can help simplify your permit application and approval process.
  • Accounting for permit fees, inspections, structural upgrades, and future tax or utility escalations in your budget will prevent you from facing unwelcome surprises during your project.
  • By working with knowledgeable professionals and staying in close contact with local officials, you’ll help guarantee your conversion is both safe and legal.

Local codes typically require you to obtain one before work begins, regardless of whether you’re adding bed space, a kitchen, or a bathroom. Permits keep you safe by making you comply with safety codes, adhere to zoning rules, and avoid fines. Other city offices have to review your plans as well for plumbing, wiring, and fire safety, for example. If you neglect this, you can get in legal trouble or have trouble selling your home down the road. Laws vary from jurisdiction to jurisdiction, so consult with your local city or county office to determine the proper procedure. The next section dissects how you can get started and what to watch out for in your neighborhood.

Why A Permit Is Essential

A building permit application for a garage conversion is more than just paperwork; it’s an essential step in ensuring your conversion project complies with regulations, safeguards individuals, and preserves your investment. Without proper permits, you’re inviting legal and financial headaches that can persist for years.

1. Legal Mandate

Permits are a legal requirement for any garage conversion. Local officials put these regulations in place to help maintain consistent and equitable building standards across the board, regardless of where you live. If you begin work without approval, you can encounter big fines and even be compelled to deconstruct modifications at your own expense.

Nearly everywhere has zoning laws that dictate land usage. Even if you bypass the permit, you may be breaking those rules unknowingly. For instance, certain municipalities require you to maintain so many parking spaces on your lot. If you take out your garage without a permit, you could be in hot water. By going through the permit process, you guarantee that your plans conform to local codes regarding such things as wall modifications, window dimensions, and roof work. We review each step to catch issues before they develop into expensive errors.

2. Safety Assurance

A permit signifies your garage conversion is up to important safety codes. They are the ones building inspectors refer to your plans and making sure it’s safe for people to live in. This is important primarily for electrical, plumbing, and fire exits.

You’ll have to install smoke detectors and have well-marked escape routes. These regulations protect you and others in a crisis. Inspectors come by while we work to ensure every phase passes stringent criteria, so you don’t overlook a thing. They verify that the walls, floor, and roof can support the proposed use. For instance, if you want to add a bathroom, the pipes need to be done correctly to prevent leaks or mold. If you bypass the permit, no professional inspects your work, and errors can be hazardous down the road.

3. Insurance Validity

Insurance companies need to see that homework is legit. If you do an unpermitted conversion of your garage, your policy might not cover any damage or injury from the new space. This can be a huge issue if there’s a fire or accident.

You need to inform your insurance company of the modification and present them with the permit. This protects your coverage and prevents claim battles. Otherwise, you might face increased insurance premiums or even lose coverage for the entire home.

4. Resale Value

Buyers verify permits before they purchase. If you didn’t get one, they could walk or pay a lot less. Banks and inspectors frequently turn away unpermitted work.

Houses with permitted improvements sell faster and sell for more. Permits demonstrate that the work was completed properly and is up to code.

Work that’s permitted is simpler to demonstrate and assists you in sales discussions.

No permit, less value.

5. Future Projects

Save your permits for future jobs. A complete history makes new projects easier.

Knowing the regulations now allows you to strategize what’s next. If codes change, your old permits prove you did it right.

Later work–like adding rooms or decks–will go smoother if you follow the rules for your garage.

Plan to avoid new problems.

Common Conversion Types

Garage conversions can satisfy a lot of needs, from extra living space to generating additional income through short-term rentals. However, homeowners must navigate the necessary building permits and permit application processes, as they all have their own rules, permit requirements, and advantages.

Conversion Type

Key Requirements

Potential Benefits

Living Space

Habitable code, insulation, ventilation, permits

Comfort, property value

Home Office

Zoning, wiring, lighting, permits

Work-from-home, productivity

Accessory Dwelling Unit (ADU)

Separate entrance, kitchen, ADU code, permits

Rental income, flexibility

Workshop

Electrical, ventilation, safety codes, permits

Hobbies, small business use

Living Space

Many homeowners embark on a garage conversion project, transforming their garage into a living space like a family room or guest suite. This process necessitates obtaining the proper permits and complying with local building codes for habitable rooms. Ensuring sufficient overhead clearance, windows for light and air, and emergency exits is essential. Given that the converted space will be occupied daily, factors like insulation, heating or air conditioning, and fire safety must also be considered.

It’s crucial to examine how the floor plan suits your life. A bathroom or even a small kitchen can add functionality. In urban areas, you might have to demonstrate adequate parking, unless your residence is located close to mass transit. Not only will these steps help you avoid fines, but they will boost your home’s value if you ever decide to sell.

Home Office

A garage becomes a quiet, solid home office. This is great for work-at-home individuals and small business owners. You’ve got to add outlets and reliable high-speed internet, and powerful lights to make the space function for extended hours. There are cities that will make you have a permit, even a home office, if you go from storage to work.

If you’re going to be meeting clients or operating a business out of your home, check the zoning regulations. These can include visitor caps, signage, and parking requirements. Good air circulation is essential, so consider opening windows or installing a vent system. A smartly designed garage office can simplify your work life and strike a healthy balance between home and job.

Accessory Dwelling Unit (ADU)

Converting your garage into an ADU is trickier. It means you include a new in-law apartment, occasionally for rental or relatives. You require an entrance of your own and a full kitchen. ADU local laws are tough, so you have to satisfy all they dictate, from fire exits to plumbing and energy consumption.

Anticipate additional scrutiny and price. Hard costs for construction, appliances, and site work can reach €100,000+. Soft costs, such as design or insurance, can tack on an additional €10,000. Permit fees may be expensive, up to €15,000 in certain cities. Still, a lot of owners experience strong returns through rental income and increased resale value.

Workshop

A garage workshop gets you working on hobbies or side business work. You have to have robust chutes for implements and proper ventilation to keep dust and fumes low.

Keep it tidy to prevent safety issues. Soundproofing is clever if you use noisy instruments.

Consult local codes for safe utilization. Obtain permits if installing large equipment.

The Permit Application Process

Applying for a building permit to convert your garage isn’t simply a formality—it’s a key step in ensuring your garage conversion project complies with all legal and technical requirements. This process safeguards your investment and ensures that your new living quarters are secure, legal, and sanctioned by the local government. Below is an outline of the main steps you will follow during the permit application process.

  • Research local zoning laws and building codes
  • Develop and finalize design plans
  • Gather and prepare all required documents
  • Apply and pay fees
  • Monitor your application and respond to requests
  • Schedule inspections and obtain official approval

Initial Research

Begin by searching for the zoning laws and building permit application requirements that cover your property. It is essential to know if garage conversions are permitted in your area and what the local rules entail—minimum ceiling height, window size, etc. Most local governments post this information online, so skim city or municipal websites or contact their offices directly.

Determine the precise permits required for your conversion project. For instance, converting a garage into habitable space generally requires at least a building permit, and possibly electrical and plumbing permits depending on the extent. If your project exceeds $15,000, a permit application is necessary. Certain jurisdictions require site approval prior to a permit being issued, so verify this upfront to prevent unexpected issues.

Create a list of all the paperwork you require. This typically includes property deeds, site plans, and renovation specifications. Fees are established locally and must not exceed actual costs. By having these details worked out in advance, you don’t get stalled down the road.

Design Plans

You’ll need a very detailed set of design plans for your application. These plans need to detail any and every alteration you intend to make, from structural changes to updates to electrical wiring and plumbing lines. Ensure your projects feature explicit diagrams and material annotations.

Collaborate with credentialed individuals for your schematics. An architect or contractor can assist you in satisfying all of the necessary codes, such as fire safety, insulation, and accessibility. Their experience can assist you in foreseeing any revision requests that may arise during review.

Bring two or three sets of your plans. Most building departments require more than one set – one for their files, one for inspectors, and occasionally one for you to have on site during construction.

Document Submission

Once your plans and paperwork are in order, turn them all in to the right office. This is typically the local building department, but may include a zoning office if site approval is required. Send electronic copies if it’s online, or hand deliver.

Pay all application and review fees upon submission. Quick payment quickens processing. Smaller projects can be issued online instantly for some permits, but complicated conversions may take days or weeks.

Save everything–documents, emails, and receipts–related to your application. Follow the status of your permit, either online or by tracking down the office, to catch any problems early.

Official Review

Once submitted, your application is then under review. They review your paperwork, blueprints, and payments. For bigger projects, anticipate a more intensive review, and be willing to respond to inquiries or supply additional information if requested.

If the city requires additional information or modifications, reply as quickly as possible. Answer delays drag the whole process out or even cause your application to expire. For site approval projects, the city has to release the hold before you get your permit.

If you don’t hear back within the expected timeline—typically a few days for small projects or a few weeks for larger—follow up with the office. The clock on your permit starts once inspections begin, and if you fail to request an inspection within six months, the permit expires.

Final Inspection

Once construction is completed, request a final inspection. This step verifies that all work conforms to your approved plans and local codes.

Prepare for the inspector’s visit by tidying the site and ensuring that all systems—electrical, plumbing, structural—are finished and exposed.

If you make it, you receive a certificate of occupancy or some equivalent. Save this paperwork, along with your inspection records, for your files or if you sell.

Unseen Financial Impacts

Garage conversions can transform your finances in ways that aren’t immediately intuitive. Although the immediate allure of extra living space and increased home value is prominent, a deeper analysis reveals a tangle of garage conversion costs and required building permits that you must evaluate. Here are the most critical financial impacts you should consider.

  1. A garage conversion can add as much as 80% or more of the project’s cost to your home’s value, so when planned and done well, it’s a smart investment.
  2. Garage conversions budget for a large price range– from roughly $15,984 to $23,187, depending on your location and local labor rates.
  3. Permit fees typically range from $1,000 – $1,500, but can go higher if your municipality has stricter requirements.
  4. Insulation by itself can run you from $2,000 to $6,000, depending on your garage size and the insulation type you opt for.
  5. If you intend to include a bathroom or kitchen, prices can soar to $50,000+, whereas a simple format might be $12,000.
  6. Overruns due to contractor backlogs—particularly in urban areas—often extend schedules and budgets past your original estimate.
  7. Utility bills will inevitably increase with additional square footage to heat, cool, and illuminate.
  8. Unpermitted work = denied insurance claims, higher premiums, and added risk.
  9. Local tax laws can reassess your property value and increase your annual taxes.
  10. Failure to factor in inspection and permit expenses can result in large fines or expensive retrofits.

Property Taxes

A completed garage conversion nearly always equates to a larger property tax bill. Local authorities, who revalue your home when you finish, often result in more taxes each year. This is because of the new living space and the increase in value.

It’s smart to investigate how your local tax office defines and calculates improvements to property. Certain states have harsh policies, and certain states may be lenient. Just get ready for a spike in your property tax bill every year. Consulting a tax pro adds yet another layer of protection, ensuring you’re not caught off guard when the bill comes due.

Home Insurance

Any significant alteration to your residence — say a garage conversion — requires you to take a look at your insurance coverage. Not keeping your provider informed can leave you open to coverage gaps. If you fail to disclose the conversion, they could deny claims if there’s damage, fire, or liability issues.

Unpermitted work makes it even more dangerous. Insurers can deny coverage for repairs or losses — and you could have to pay steeper premiums. Be sure to inform your provider immediately once the project is completed to ensure your coverage remains current and valid.

Utility Costs

Energy expenses increase when you expand your living quarters. More rooms equate to more heating, cooling, and electric usage. These increases can accumulate rapidly.

You can help mitigate these expenses with efficient insulation ($2,000-$6,000) and energy-saving appliances. Monitor your bills closely post conversion. If you notice any unexpected spikes, deal with them early. Even easy things, such as swapping in LED lights or updating window seals, can add up in the long run.

Critical Structural Changes

Critical structural changes are the soul of every garage conversion project. These kinds of changes ensure the space is secure, code-compliant, and suitable for habitation, meeting necessary building permits and zoning restrictions. Without thoughtful planning and modernization, your garage conversion won’t make it past scrutiny or keep anyone safe.

Foundation

Your initial point of inquiry should be the garage foundation. Most garages have cheap slabs that aren’t designed to support a living area. If you notice cracks or shifting, you’re going to require repairs or reinforcements for safety and to comply with building code requirements. Other times, you’re going to have to toss in waterproofing or even a new slab, particularly on older builds or wet zones. This type of work usually requires additional building permits and inspections, which might run $200 to $1,500 just for the paperwork. The real chic fixes can range from $2,000 to $10,000 – depending on what needs fixing. If you’re in an area with unstable soils or if you have a hillside site, garage conversion costs can rise for retaining walls or additional site work. Always include these costs in your calculus from day one.

Ventilation

Well, air flow is crucial in any new digs, especially when considering a garage conversion project. Garages are typically constructed without ample windows or vents, so you might need to cut in new ones or provide mechanical ventilation to meet building permit application requirements. Natural airflow does wonders for air quality and reduces humidity, but if windows or vents are insufficient, you’ll want to install a fan or air exchange system. Local codes tend to dictate aggressive requirements for ventilation, particularly for ADUs. Missing these rules can mean redoing the work later, which becomes expensive, especially when considering the garage conversion costs. Be sure to verify code regulations before beginning, as these vary by city and county.

Insulation

Insulation keeps your new home cozy and energy-wise, especially when considering garage conversion costs. Most garages are minimally or not insulated, so you’re going to need to do it here on the walls, roof, and sometimes floor. Select materials that align with your local energy codes—mineral wool or foam boards, for example, tend to perform well. Think insulation prior to closing up walls, because no insulation or bad insulation translates into higher bills and less comfort down the road. During the winter months, high-quality insulation in cold climates locks the heat inside, reducing heating expenses. Insulation costs are typically minimal about the gains, but if you delay, retrofitting can be difficult and costly.

Egress

You’d better have safe exits in a converted garage to meet building code requirements. Codes need doors or windows huge enough for people to get out of in a fire, and these exits must have unblocked routes to ensure safety. Addressing these permit application details correctly from the beginning prevents headaches during inspections. If you skip or miss a code detail, you risk fines or costly rework, making right-of-way a safety-first priority, not just a compliance issue.

Navigating Local Authorities

Knowing how to navigate local authorities is an important aspect of a garage conversion project. Each city or region maintains different building permit application regulations, departments, and procedures. You have to know who does what, how to contact them, and what to do to keep your project compliant with building code requirements and running smoothly. If you’re lucky enough to be in Minneapolis or wherever, these steps get you working within the system and not getting fined and delayed.

Finding Rules

Initially, consult your city’s website for the necessary building permits and zoning regulations. Many cities, like Minneapolis, provide detailed information online (www.minneapolismn.gov/business-services/planning-zoning/). These regulations will clarify whether you can proceed with a garage conversion, the modifications allowed, and the requirements for aspects like insulation, fire safety, and parking. If the information isn’t available online, visiting your local city office or planning department can be beneficial, as staff can guide you to the correct forms and assist with questions regarding your property.

Attending a local workshop or community meeting can also be advantageous. These events provide excellent opportunities to receive updates, ask questions, and meet officials. In some cities, such meetings occur frequently and are listed on the city’s website (www.minneapolismn.gov/government/city-council/meetings/). Once you gather all the information, summarize the main rules, including the required permit applications, key steps, and any special restrictions in your district, to effectively communicate with your contractor or architect.

Hiring Professionals

Create a contractor checklist. Begin with some garage conversions under your belt, then mix in some local code experience, some great reviews, and some really solid references. Get estimates from a couple of builders/designers. Compare not just price, but what services they offer—some will take care of permits for you, others won’t.

Request to view licensing and previous work. Verify references, particularly from individuals who undertook comparable projects. A pro in your corner will help you stay out of legal trouble, catch problems early, and pass inspections.

Avoiding Pitfalls

A lot of folks just jump through steps or expedite the paperwork. This can result in hefty fines or being compelled to reverse work. Always keep detailed records: emails, meeting notes, and receipts. If an inspector or city official offers advice, take notes. Use your city’s 311 Service Center to report issues or ask for help if something is unclear.

Keep in contact with your contractor and the building inspector. If an issue arises, resolve it immediately. When inspections occur, be present if possible. That way,y you can listen to feedback first-hand and pose direct questions. It establishes trust with officials and can hasten the process.

Conclusion

Financing your garage conversion is a wise decision. A permit protects your project and makes it legal. It demonstrates that your space complies with all local regulations. It may be hard, but it keeps you out of trouble – saving you from fines and long delays. A lot of people skip permits and get stuck down the line. You lose out on increased home value and jeopardize future issues if you sell. A permit assists if your scheme requires major modifications, like tearing down walls or wiring new electrical. Local staff can assist if regulations seem weird or ambiguous. Your project will go smoothly if you begin with the correct permit. Consult your local office before construction. Want more tips or to share your story? Join the conversation below.

Frequently Asked Questions

1. Do You Need A Permit For A Garage Conversion?

Yes, you generally require a building permit application for a garage conversion. Proper permits ensure your conversion project is safe and complies with zoning and building code requirements. Always double-check with local authorities before beginning.

2. What Happens If You Convert Your Garage Without A Permit?

Converting your garage without the necessary building permits can lead to fines, legal complications, or the need to reverse the conversion project. Unpermitted work may lower your property value and create issues when selling.

3. Are All Types Of Garage Conversions Treated The Same By Local Authorities?

No, different conversions, such as a garage conversion to living space or office, can have different building permit application requirements.

4. How Long Does The Permit Application Process Usually Take?

The permit application process may take anywhere from a few weeks to a few months, depending on your location and the complexity of your garage conversion project. Early starts prevent holdups.

5. Are There Financial Impacts Beyond The Permit Fee?

Yes, there can be additional expenses related to the building permit application process. This can range from utility upgrades to paying for inspections or hiring professionals to ensure compliance with construction codes. Budget for it!

6. What Structural Changes Might Require Additional Approval?

Significant modifications — changing walls or windows, relocating plumbing or electrical — may require necessary building permits and inspections. Always check with a professional about permit application requirements before going structural.

7. Who Should You Contact For Permit Requirements In Your Area?

Check with your local building or planning department for necessary building permits and permit application requirements.

Your Dream Home Addition Built By Mares & Dow Construction & Skylights – Let’s Create The Extra Space You’ve Been Dreaming Of

Expand your home’s potential and enhance everyday living with a custom home addition from Mares & Dow Construction & Skylights. With over 40 years of construction experience, we specialize in high-quality additions that seamlessly integrate with your existing structure and lifestyle needs.

Whether you’re planning a new primary suite, second-story expansion, or an in-law unit, we tailor each addition to match your vision, your home’s architecture, and your long-term goals.

Key benefits of our general home addition services include:
• Adding valuable square footage for growing families or multi-use living
• Increasing your property’s value with expert design and construction
• Creating energy-efficient, modern living spaces tailored to your needs

Proudly serving Contra Costa County—including Alamo, Danville, Orinda, Martinez, and San Ramon—Mares & Dow Construction & Skylights is your trusted partner for functional, beautiful, and lasting home additions.

Contact Mares & Dow Construction & Skylights today for a free, no-obligation quote, and let’s build your ideal home addition together.

Disclaimer

The materials available on this website are for informational and educational purposes only and are not intended to provide construction, legal, or professional advice. You should consult with a qualified general contractor or industry professional for advice concerning any specific construction project, remodeling plan, or structural concern. Do not act or refrain from acting based on any content included on this site without seeking appropriate professional guidance. The information presented on this website may not reflect the most current building codes, regulations, or industry best practices. No action should be taken in reliance on the information on this website. We disclaim all liability for actions taken or not taken based on any or all of the contents of this site to the fullest extent permitted by law.

Why Are Permits So Important for Deck Installation in Contra Costa and Alameda Counties?

Key Takeaways

  • Permits protect residents by guaranteeing adherence to structural and safety regulations, so there are fewer accidents and injuries.
  • Permits help maintain or increase property value, as the deck is verified to be up to local building codes, thereby appealing to future buyers and avoiding chances of value loss.
  • Remaining in compliance with county rules prevents homeowners from incurring legal and financial penalties, including the possibility of being ordered to remove or alter unpermitted structures.
  • Detailed plans submitted well in advance and done in coordination with a local authority can save your deck project.
  • Knowing and following local codes, like seismic and fire requirements, is important for legal and safe deck building, especially in areas susceptible to earthquakes or fires.
  • By completing required inspections at every stage during construction, we are able to ensure long-term durability and compliance, while laying the groundwork for future insurance claims or property transactions.

Getting a permit is really important when building a deck in Contra Costa and Alameda counties. Permits help make sure that all deck projects follow local safety rules and building codes. They let officials check if the deck’s design and materials are safe for people, homes, and the environment. Inspectors look for things like strong foundations, safe railings, and correct distances from property lines and utilities.

If a homeowner skips getting a permit, they could face fines, delays, or even have to take the deck down. Having a permit can also help with insurance claims and selling the house, since buyers and real estate agents want proof of proper work. The next section will explain how the permit process works and why it matters for every project.

What Is a Deck Permit?

A deck permit is an official authorization from your local building department that allows you (or your contractor) to construct a deck that meets all applicable building codes and zoning regulations. In Contra Costa and Alameda Counties, the permit ensures your deck is:

  • Structurally sound
  • Compliant with fire safety codes
  • Built to withstand seismic activity (critical in California)
  • Not infringing on property setbacks or easements
  • Safe for you, your family, and guests

In Contra Costa and Alameda counties, deck installation permits are essential for protecting you, your family, and your neighbors. They ensure that your deck is built safely and meets local regulations, making it strong enough for people and furniture. Permits guarantee the deck follows design plans, which helps prevent instability and collapse. Having the proper permits can also increase your property’s value for future sales and help resolve any neighbor disputes quickly. While it might seem like an extra step, obtaining a permit is crucial for safety and durability.

Permits are a given for the majority of work done in Contra Costa and Alameda counties. They’re not only legally necessary, but they serve a role in ensuring deck projects are safe, legal, and property-enhancing.

1. Ensuring Safety

A permit ensures that a deck is constructed sturdy enough to support the weight of occupants, chairs, and elements. Local officials review plans and inspect the deck to determine if it complies with safety regulations and appropriate load-bearing standards. These inspections reduce the risk of deck failure or other hazards.

Things like railings and footings get looked at during inspections. These aren’t just cosmetic—they’re meant to prevent falls and help stabilize the deck. Codes establish specific requirements for how high and sturdy railings must be, and how deep footers need to extend to prevent settling in various soils. For instance, a deck with a flimsy railing or shallow footings can collapse, causing injury or expensive damage. Permit rules educate homeowners on the most effective ways to build safely and why it all matters.

2. Protecting Value

A permitted deck demonstrates to buyers and banks that the deck was constructed properly. When selling a home, permit evidence can accelerate sales and allow sellers to fetch a premium. Unpermitted decks can reduce a property’s value or even prevent a sale if banks won’t sign off on a loan.

Adhering codes causes a home to fit in with its surroundings and meet community standards, which can increase the desirability of the entire neighborhood. Just plain quality construction, supported by permits, is a shrewd play for anyone who wants their home’s value to last.

3. Maintaining Compliance

Local regulations evolve and counties revise codes to address deficiencies or introduce new safety requirements. Permits are a means of demonstrating that a deck complies with these regulations. Permits require specific plans and information, so nothing is left to speculation.

Dealing with city or county offices clears up confusion over what is permitted. That keeps you out of trouble with fines, delays or even tear downs.

4. Securing Insurance

Insurance companies want evidence that decks were permitted. If a claim is made for injury or damage, the company will look for this evidence.

Claims for unpermitted decks may get denied. Talking with an agent before building helps. Permits are key for keeping insurance valid.

Understanding the Permit Process

Getting a building permit prior to adding a deck in Contra Costa and Alameda counties, for example, is more than a procedural formality—it’s a multi-step process that guarantees the project is compliant with all legal, safety, and quality standards. Each municipality has its demands, so knowing the right process can save you expensive delays and compliance headaches.

Steps to Obtain a Permit

  1. Investigate local permit needs and read guidelines on the city or county government web site.
  2. Fill out the joint permit application form including all relevant project information and signatures.
  3. Collect supporting documents such as construction drawings, site maps and engineering reports.
  4. File the application and pay its fee which varies depending on the size and complexity of the project.
  5. The building department will review the application — a process that can take anywhere from days to weeks.
  6. When your application is returned to you with requests for information or corrections from reviewers, respond expeditiously.
  7. Secure the permit and post it on site prior to initiation.
  8. Arrange required inspections at important construction milestones to maintain compliance.

Delays typically occur because of incomplete applications, missing documents or backlogs at the building department. Getting to know the local timeline and requirements can save you from fines or even a project shutdown.

Application

Filling out the joint permit application correctly is your initial path to approval. Even small mistakes or missing information can lead to processing delays and threaten the project timeline. You want to apply as soon as all your information is ready, and quite often this means waiting for test results or your landscape design. Be sure to provide all necessary project details—like the deck’s size, materials and site location—so that your review goes smoothly. Working with experienced contractors can help spot those missing details and make sure you fill out every section of the form.

Documentation

  • Construction drawings with deck design, materials and dimensions (metric)
  • Site plan indicating property lines and deck location
  • Structural calculations, especially for decks requiring seismic reinforcement
  • Documentation of ownership or permission from the owner

Everything has to be building department compliant. Checking local zoning codes verifies that your proposed deck satisfies spacing and land use regulations. Arranging your papers sensibly can cut down on review times and prevent silly mistakes from slipping through the cracks.

Review

The review phase is conducted by local building officials who review the application for code compliance, safety, and environmental impacts. Any comments or requests for clarification should be responded to promptly in order to maintain momentum. They evaluate based on such things as structural integrity and safety measures, and seismic reinforcement in areas with earthquakes. An early and proactive dialog with the building department can head off problems before they arise and increase the likelihood of approval.

Understanding Local Codes

When building a deck in Contra Costa or Alameda counties, you must follow strict local and state building codes designed to ensure structural safety, fire resistance, and neighborhood compliance. Each city or unincorporated area may enforce slightly different rules or amendments to the California Building Code, so it’s essential to consult your local building department before starting any work.

In California, most decks do require a permit—especially if the deck:

  • Is attached to the home,
  • Is more than 30 inches (76.2 cm) above grade at any point,
  • Exceeds 200 square feet, or
  • Serves as a platform for utilities like electrical or plumbing.

Freestanding decks that are under 30 inches high, less than 200 square feet, and not attached to a structure may be exempt in some municipalities, but this is not universal. Fire hazard severity zones, seismic codes, and wildland-urban interface regulations may also influence design and material requirements.

To avoid costly red tags or rebuilds, verify local code interpretations with your city or county building office—each may have its own permit thresholds, inspection timelines, and compliance standards.

Seismic Zones

County

Seismic Zone

Key Requirements

Contra Costa

4

Must use reinforced footings, steel connectors

Alameda

4

Bracing, anchor bolts, engineered fasteners


Decks in these counties rest in high seismic zones. Which means additional measures for security, including such things as steel-reinforced footings and metal ties. Local codes demand these to prevent quake collapse. If you’re going to build, talk to a structural engineer early. They understand local codes and can assist with blueprints. Again, city offices have guidelines for seismic safety, and these can change, so be sure to check for updates.

Fire Codes

  • Deck boards must be made from fire-resistant materials.
  • Space between boards should be a minimum to avoid accumulation of debris.
  • Decks need a certain distance from property lines and structures.
  • Railings and supports need to resist ignition.

Fire is a real risk, especially during dry seasons. Most localities say you have to use materials that slow or stop flames. This means things like composite boards or treated wood. Don’t forget about spacing—small gaps between boards help keep leaves from piling up and catching fire. Local fire departments can provide a list of approved products and methods. If your deck is close to a house or fence, there are extra rules, so always ask before you start.

Zoning Rules

Zoning indicates where a deck is permissible. Most jurisdictions determine how close decks can be to property lines, roads or neighbors. These “setbacks” avoid future conflicts and keep the street looking tidy.

Decks, for example, tend to have height and square footage restrictions. If you build too high or cover too much yard, you gotta take it down. Local zoning establishes regulations for lighting and privacy screens as well. If you’re not sure, call the planning office. They answer questions, even before you file plans.

The Key Checkpoint for Inspections

Inspection is big during deck installation in Contra Costa and Alameda counties. This stage verifies local rules compliance and safety. Unpermitted projects typically attract closer inspections. Preparing for every inspection step staves off tardiness and makes for a seamless build.

Foundation

The initial giant leap is ensuring the base camp is inspected. Footings have to ensure that they meet local codes for strength and safety, particularly because decks tend to have a high load capacity. Soil problems, such as inadequate drainage or weak soil, must be addressed prior to construction. All checks should be put in writing for evidence, which assists if issues arise down the road.

Framing

Framing inspections examine the skeleton of the deck. Every beam and joist needs to be the right size and use the proper material. Inspectors ensure they’re stable and don’t have any vulnerable spots. If it’s wrong, fix it immediately so there aren’t any hold ups. Maintaining contact with the inspector clarifies any confusion and facilitates the process.

Final

This final pass inspects the entire project. All work to correspond with plans on file. The inspector leaves an inspection card when everything is completed and passed, indicating the deck is safe and legal. Small fixes might arise, but these should be addressed prior to people using the deck.

cover-image-Deck-Installation

Dangers of Building Without Permits

Building a deck without required permits in Contra Costa and Alameda counties can expose homeowners to financial, legal and practical risks. It’s because these problems impact long-term property value and safety as well, making adherence to local building codes necessary.

Financial Penalties

Building a deck without proper permits in Contra Costa or Alameda counties can result in significant financial consequences. Cities and counties across California have the authority to issue fines and require remediation when unpermitted work is discovered. Here’s what you should know:

Common Financial Consequences

Item

Estimated Cost (USD)

Initial Code Violation Fine

$100–$500 per day (varies by city, may start at $350–$600)

Ongoing or Accrued Penalties

Up to $1,000/day in some jurisdictions (cumulative fines can exceed $2,000 if ignored)

Retroactive (After-the-Fact) Permit

2–3x normal permit cost: $500–$2,500+

Mandatory Inspections or Upgrades

$1,000–$5,000+, depending on code violations

Insurance Premium Increase or Denial

Varies — insurers may increase premiums, exclude coverage, or deny claims


Fines stress project budgets, particularly when unexpected. Insurance rates might rise as well if the insurer discovers the non-compliance, driving up costs in the long term.

Legal Orders

Local authorities could even order to stop work or demolition of unpermitted decks. Cease-and-desist notices can shut projects down mid-way, requiring owners to take the structure down or make expensive modifications. Such lawsuits tend to translate to extended project delays and additional legal fees. It’s always smart to consult a legal expert early to head off or solve these problems. To make matters worse, if a deck gets destroyed, the county might not allow it to be rebuilt – particularly if it was never permitted to begin with.

Resale Complications

Listing a home with unpermitted work is usually tricky. Buyers could be afraid of liability, or banks might refuse to lend money on the property. This can decrease your pool of potential buyers and decrease your property’s value. Sellers might be forced to disclose the unpermitted work, resulting in hard-ball negotiations or price adjustments. Others, the appraiser may value the home lower, or require repairs, before the sale can move forward.

Long-Term Non-Compliance

Building a deck without a permit can lead to serious problems. If the deck isn’t up to code, it might be unsafe and hard to fix. If the authorities find out, homeowners may need to pay their tenants to move out, which can cost anywhere from $5,000 to over $15,000. In some cases, tenants could even sue for back rent if their home is unsafe to live in. Buying a property with a deck that doesn’t have the right permits can create more legal and money issues.

Working with Other Organizations

Constructing a deck in Contra Costa or Alameda County involves much more than just hiring a contractor or drafting blueprints. The process requires close collaboration with a variety of government agencies, each with their own specific requirements and approval procedures. Here’s what homeowners should be prepared for:

  • Local building departments are the primary point of contact.
    These departments regulate size, height, and setback limits to ensure that your deck fits local zoning and community standards. Always check your city or town’s specific building codes before moving forward—what’s acceptable in one jurisdiction may be denied in another just a few miles away.
  • Direct communication with agency personnel is often necessary.
    Permit forms can be confusing or outdated, and guidelines sometimes change. Reaching out to staff for clarification can save time and avoid mistakes later in the process.
  • Environmental considerations may require additional approvals.
    If your deck affects natural features like trees, creeks, or wetlands, you may need to work with state or federal environmental agencies. These bodies often require added documentation to protect green spaces—for example, demonstrating how you’ll control runoff or prevent erosion near protected waterways.
  • Expect delays during the review process.
    Once you submit your plans, responses can take anywhere from a few days to several weeks, depending on the agency’s workload and the complexity of your project. You may also need to revise and resubmit plans based on feedback regarding materials, structural support, or drainage.
  • Inspections are ongoing and can impact your timeline.
    Inspectors will visit during construction to verify that work aligns with the approved plans. If anything is out of compliance, construction may be paused until the issue is corrected.
  • Proactive communication helps minimize setbacks.
    Starting conversations early, submitting complete information, and responding quickly to follow-up questions reduces the likelihood of approval delays. Sometimes, compromises—like adjusting your deck’s size—are needed to meet requirements and move forward.

Working with these agencies can be time-consuming, but a cooperative and informed approach makes the process much smoother.

Conclusion

Permits create the roadmap to safe and enduring decks in Contra Costa and Alameda counties. They get you in line with regulations, avoid penalties, and keep your project moving. A permit demonstrates that you care about safety, quality work and your neighbors. Local codes can change quickly, so permits keep you current. Skip a permit, pay big costs or tear down your deck. 

Inspectors want to identify issues ahead of time, not hold you back. Agencies might request plans or inspections, but every stage creates confidence and protects you. Want your deck to stand the test of time and increase your home’s value? Begin with the right permit. Contact us with your plans or questions, and receive actual assistance from local experts.

Frequently Asked Questions

1. Why do I need a permit for deck installation in Contra Costa and Alameda counties?

Permits make sure your deck complies with safety and building codes. They safeguard you — and your property and potential future buyers — from expensive issues or legal problems.

2. What happens if I build a deck without a permit?

Unpermitted decks can result in fines, removal or issues selling your home. Insurance claims can be denied as well if damage occurs.

3. How do I apply for a deck permit in these counties?

You submit plans and an application to your local building department. They inspect your paperwork, verify it’s to code, and give you the ok if it is.

4. What local codes affect deck construction?

Decks have to adhere to county and city building codes. These include structural safety, materials, height and placement. Codes can vary between Contra Costa and Alameda counties.

5. Why are inspections required during deck installation?

Inspections verify that your deck is constructed safely and up to code. They inspect the foundation, framing and final construction before approving the work.

6. Can I start building before getting a permit?

No. You have to wait for approval before any work commences. Building first invites fines and additional fees to bring non-compliant work up to code.

7. Do deck permits involve other agencies besides the building department?

Yes. Certain projects might necessitate inspections from fire, planning, or environmental departments. This makes certain your deck is compliant with all local and regional codes.

Your Dream Deck Installed by Mares & Dow Construction & Skylights – Let’s Build a Beautiful Outdoor Space Together

Expand your living space and elevate your outdoor lifestyle with a custom deck designed and installed by Mares & Dow Construction & Skylights. With more than 40 years of construction experience, we specialize in high-quality deck installations that blend style, durability, and functionality.

Whether you’re picturing a peaceful retreat, an entertainment hub, or a seamless indoor-outdoor transition, we tailor each deck to fit your home’s architecture and your personal vision.

Key benefits of our deck installation services include:
• Creating a welcoming outdoor area perfect for relaxing, dining, or hosting
• Boosting property value with expert craftsmanship and quality materials
• Offering long-lasting, weather-resistant solutions customized to your space

Proudly serving Contra Costa County, including Alamo, Danville, Orinda, Martinez, and San Ramon, Mares & Dow Construction & Skylights is your trusted deck-building partner for timeless design and long-term performance.

Contact Mares & Dow Construction & Skylights today for a free, no-obligation quote and let’s build your dream deck together.

Disclaimer

The materials available on this website are for informational and educational purposes only and are not intended to provide construction, legal, or professional advice. You should consult with a qualified general contractor or industry professional for advice concerning any specific construction project, remodeling plan, or structural concern. Do not act or refrain from acting based on any content included on this site without seeking appropriate professional guidance. The information presented on this website may not reflect the most current building codes, regulations, or industry best practices. No action should be taken in reliance on the information on this website. We disclaim all liability for actions taken or not taken based on any or all of the contents of this site to the fullest extent permitted by law.

© Mares & Dow Construction & Skylights, Inc.
Customer rating: 4.5 / 5 Mares Dow Rating based on 57 reviews
Like Us On Facebook  Follow Us On Twitter  RSS Feed