High-quality concrete foundations provide your property with both support and longevity. The advantage? When you select quality, handcrafted concrete, your construction remains firm for decades of storms, soil movements, and daily wear and tear. Cracks, leaks, and sinking floors usually originate with a sketchy foundation, and repairing those down the line can be time-consuming and expensive. Quality concrete plays a role on the energy front by maintaining interior spaces comfortable and dry. Safe buildings, to property owners, equate to fewer repairs and more resale value. In regions with shifting soils or wet seasons, a durable foundation protects your investment from danger. To assist you in determining what works for you, the body will demonstrate essential advantages and provide advice in selecting the right foundation.
Key Takeaways
- A high-quality concrete foundation is essential for maintaining the structural integrity and long-term stability of your property, reducing the risks of major failures.
- By prioritizing top-quality materials and expert workmanship, you can steer clear of expensive repairs and enjoy long-term peace of mind.
- A solid foundation not only provides peace of mind but also makes your property more valuable and desirable to potential buyers.
- By prioritizing frequent inspections, proper soil analysis, and good water drainage, you can avoid costly problems down the road and protect your investment from the forces of Mother Nature.
- By learning about foundation types and their advantages, you can better select the best option for your structure.
- Proactive foundation care and maintenance decrease liability risks, insurance costs, and keep your property safe and valuable for many years.
The Enduring Value Of A Superior Foundation
What a good concrete foundation defines is the security, worth, and destiny of your property. The foundation is the base layer that supports your building, distributes various loads, and protects against weather stress. Its enduring value equates to less concern, more savings, and actual relaxation.
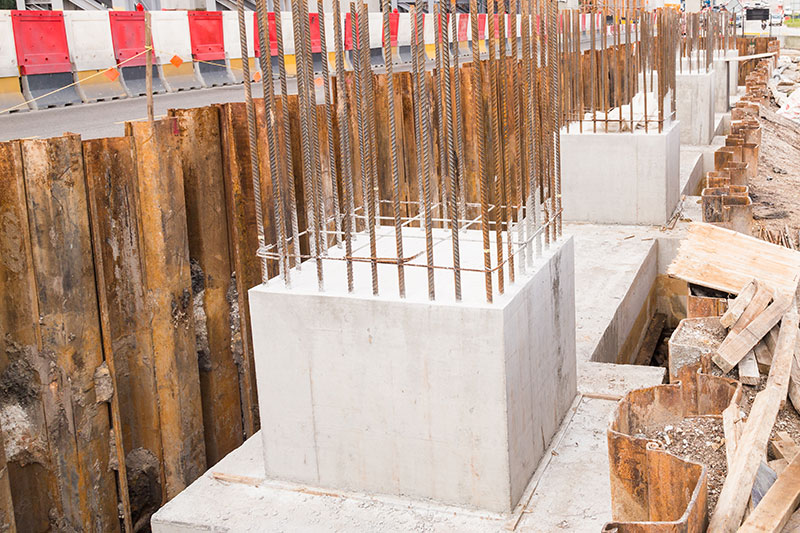
Structural Integrity
There’s the right blend of concrete, rebar, and strategically engineered footings that make for a solid foundation. These materials assist your structure in supporting not only itself, but individuals, furnishings, and whatever else life delivers—what engineers refer to as dead loads and live loads.
If your foundation is weak or poorly constructed, you face sagging floors, cracked walls, and even structural collapse. Top-notch craftsmanship, on the other hand, keeps you out of these headaches, so your home stays solid longer with less maintenance. For instance, a well-constructed concrete foundation will remain for over 150 years with care.
It’s the footings that roll, too. Well-designed footings distribute the load, which prevents your building from shifting on various soils and helps the remainder of your structure remain flat over time.
Financial Security
Quality up front keeps repair bills down. Using solid materials and good techniques may cost more at the start, but you skip expensive fixes later, which can run between $2,010 and $7,717 for each home.
Solid concrete translates to less cracking, seepage, and shifting, and it saves you money in the long run. A foundation that endures translates to less money spent on patching, painting, or repairing floors.
The right mix and good workmanship = your foundation will endure. That’s clever for your wallet, as you sidestep major fixes and maintain your asset value.
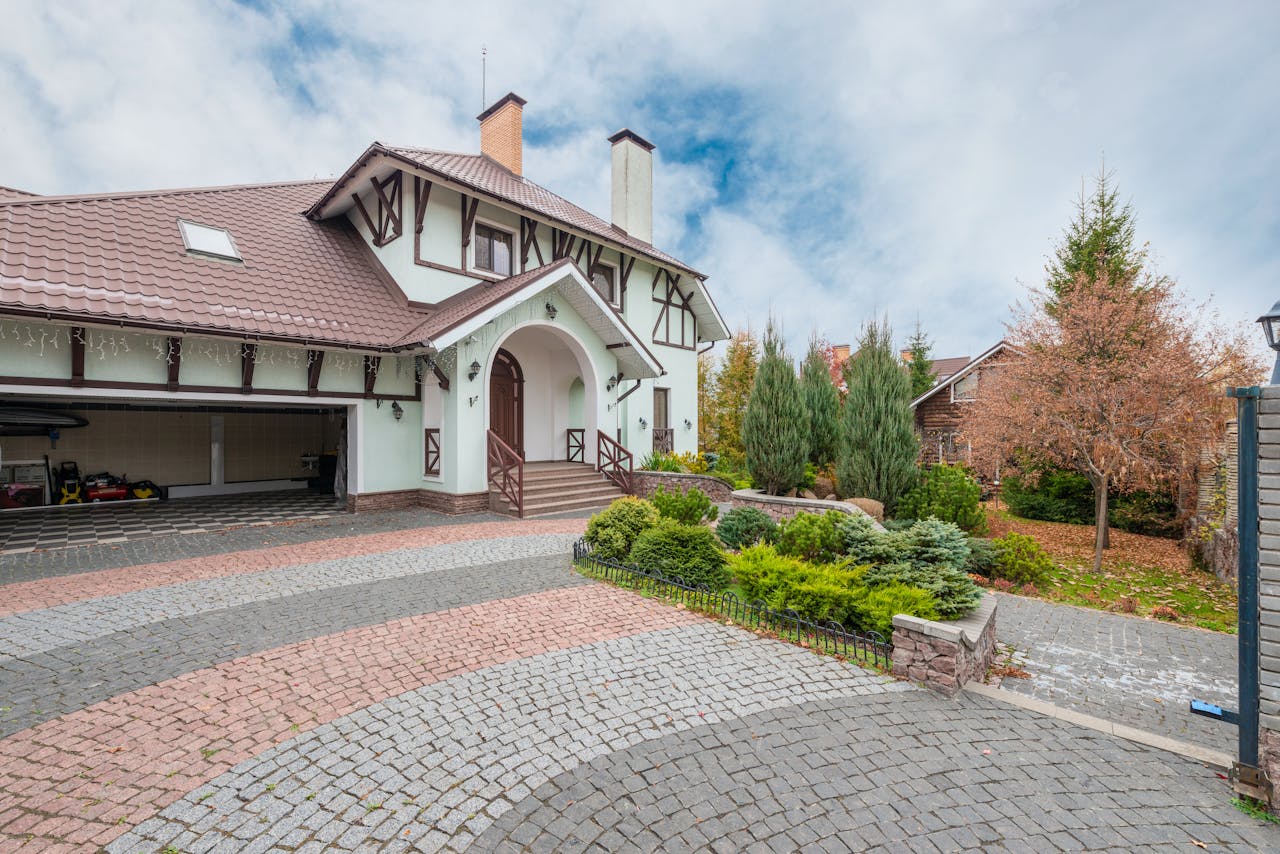
Property Value
A house built on a great foundation sells more easily. They trust what they can’t see — properties that don’t show cracks or signs of settling. Bottom line, good concrete work pays you back and increases your home’s value.
It means your home wears better, longer. No cracked walls, buckled floors, or sticking doors—these are all things buyers look for. A solid foundation secures your investment, establishes buyer trust, and increases appraisal.
Foundation Type | Durability (years) | Value Impact | Maintenance Cost |
High-quality Concrete | 100–150+ | High | Low |
Basic Concrete | 50–80 | Moderate | Moderate |
Stone or Brick | 80–100 | Moderate | High |
Timber | 20–40 | Low | High |
Personal Safety
The primary work of a great foundation is to protect you. It withstands storms, quakes, and soil shifts, which prevents your building from shifting or cracking.
Quality concrete prevents cracks from expanding, keeping your home secure. Periodic inspections are essential—they enable you to identify minor problems before they become significant hazards.
A superior foundation ensures you and your family are more secure.
Inspections matter.
Future-Proofing
All great designs begin with a strong foundation. If you decide to add rooms or floors down the line, your foundation must already be prepared for additional mass.
Modern techniques can extend your concrete to withstand floods, heat, or settling soil. You can select green concrete mixes that reduce your building’s carbon footprint.
A good foundation stands prepared for what’s next.
What Defines A Quality Foundation?
A solid foundation protects your investment. It depends on quality substances, skilled craftsmanship, and an informed understanding of the earth beneath your structure.
Soil Analysis
Soil is the foundation of all fine foundations. Begin with a soil test to find out what kind of earth you’re working with. This step looks for issues such as swelling clay or shifting sand. Not all sites are created equal. Some require deeper footings or more steel. Information from these tests allows you to adapt the foundation type to your site. If you skip this, cracks or sinking can present later.
A quality soil report reveals just how deep to dig, too.) You receive truths, not assumptions. This reduces the chance of future repairs. Recording soil information allows builders to schedule the job and steer clear of major surprises.
Material Selection
The appropriate concrete mix counts. Select premium mixes that go up to 21 megapascals (around 3,000 psi) for a robust, durable foundation. Concrete with rebar in it is superior to blocks or bricks. It’s resilient and won’t crack. Ask for concrete poured in one continuous operation – no cold joints – so you enjoy fewer leaks and stronger walls.
Sustainable choices assist as well. Others rely on less cement or recycled additions, reducing your footprint. Compare suppliers to ensure that they observe building codes and provide dependable service.
Expert Craftsmanship
An experienced builder is essential. Look for pros who demonstrate how to pour, level, and cure concrete properly. Curin, on the other hand, keeps the mix moist so it develops full strength. If your crew skips steps or cuts corners, you can get weak spots or leaks. The top teams adhere to local codes, employ appropriate tools, and maintain the site clean and well-graded.
Quality means less maintenance down the road. Though a quality foundation may account for 8%–15% of your overall building expense, it returns in reduced repairs and increased assurance.
Key Characteristics
Strength, durability, and the proper blend of ingredients differentiate a quality foundation.
A quality foundation is defined by professional craftsmanship, durable components, and a meticulous soil investigation.
The Hidden Costs Of Cutting Corners
A cheap concrete foundation, for example, can appear to be a substantial savings, but over the long run, that cost-saving measure can prove more expensive than any other. Cutting corners on quality leads to structural failures, water damage, diminished home value, and intrusive repairs that wreak havoc on your budget and sanity.
Structural Failures
- Poor soil preparation
- Low-grade concrete mix
- Inadequate steel reinforcement
- Faulty construction techniques
- Ignoring local building codes
When you use cheap materials or rush the build, these errors translate into cracks, settling, or even collapse. Safety risks escalate quickly, and even a small crack can become a big danger. They frequently require costly remedies, costlier even than the initial work. Put your money into a good base to start with, and you’ll have fewer headaches and a more secure structure for years ahead.
Water Damage
Poor drainage at your foundation allows water to trickle into basements and crawl spaces. In the long run, this causes mold, rot, and even damage to your electrical and plumbing systems. Water can scour concrete, degrade walls, and give you dank odors and health issues. Good drainage and moisture barriers do make a difference, keeping your property strong and dry.
Moisture penetration not only damages the home. It means higher energy bills as the building loses insulation value. It’s so much easier to install systems like proper gutters and drainage systems early than it is to address the damage afterwards.
Diminished Value
Sloppy groundwork knocks property value quickly. Purchasers see cracks or repairs and become leery. They might walk away or bid a lot less than anticipated. This can make it difficult to sell or refinance your property.
Repair bills stack, and even if you do retrofit past concerns, buyers fear the ‘unknowns.’ Opting for quality from the outset helps maintain your home’s value.
More Repairs, Less Peace
More repairs equal more time, money, and stress. Faulty foundations attract continual repairs. Every patch accumulates, sucking your budget dry. Wickedly clever.
The Unseen Financial Ripple Effect
Superior concrete foundations are about more than propping up your structure. They determine your insurance premiums, your resale value, even your litigation exposure. Dig a little deeper, and the unseen financial ripple effect of bad foundations can start to accelerate.
Insurance Premiums
They don’t just see the cracks in the plaster — insurance companies look hard at the ground your building stands on. If your home has a stout concrete foundation, providers view less risk. Cracks, settling, or previous repairs send your premiums soaring. The logic is simple: homes with a shaky base cost more to fix and are more likely to have claims. Even seemingly minor foundation problems — such as small cracks or sloping floors — can make your property look dicey. This risk can result in policy exclusions or high deductibles. Eventually, you’ll end up paying more simply to maintain coverage. On the flipside, maintaining your foundation in prime form may translate to consistent, reduced payments every year. The price of repairing things early is often significantly less than years of higher insurance premiums.
Resale Hurdles
Buyers everywhere pause at foundation issues. You may discover it won’t sell as fast, or you may receive fewer offers. Even if you do get a buyer, prepare for hard negotiations about price. Foundation repairs are expensive, and buyers are aware of it. Most will request a price reduction or require you to make repairs before closing. Certain banks won’t even lend on homes with known foundation problems. It’s wise to address issues before listing, so you can provide home inspector reports and offer reassurance. Hard concrete underneath your land increases your odds for a quicker, simpler sale.
Liability Concerns
If your edifice’s foundation is shaky, you’re risking more than just fixing invoices. Structural collapses—such as popped walls or sagging floors—can lead to injuries. If someone falls and hurts themselves, you can be liable for claims or lawsuits. Legal fees and settlements can exceed the cost of repairing the foundation to begin with. With your foundation in good shape, you reduce hazards, shield your credibility, and safeguard your investment.
Foundation Types And Their Purpose
Each structure requires its type of foundation, tailored to its soil, weather, and design. Each of the three major concrete foundation types—slab-on-grade, crawl space, and full basement—has its purpose. Choosing the correct one saves you from expensive fixes and promotes your building’s healthy future. Below, peek at how each works and what to ponder for your next project.
Slab-On-Grade
A slab-on-grade is one layer of concrete poured right on the ground. It’s easy to put in and a lot cheaper than the alternatives, frequently selling for roughly $8,250. This type is preferred where the soil is sound and where the climate is without freeze and thaw. You eliminate labor and materials, and it’s fast to construct.
Slab foundations can crack or shift if the soil expands, shrinks, or becomes saturated. In areas with harsh winters or heavy rains, slabs may not hold up as well. Repairs are tricky since plumbing and wiring are set in the concrete. Over time, this type of foundation fares well if the soil remains dry and stable, but it’s not the ideal solution for every site or climate.
Crawl Space
Crawl space foundations elevate the home slightly above the ground, creating a space that aids in ventilation and provides access to plumbing or electrical wiring. It’s convenient for storage or as a furnace room. In regions of moist soil, crawl spaces can preserve the dwelling’s dryness.
You have to manage moisture to prevent mold and wood rot. Crawl spaces can assist with future repair or upgrades, as there is space to work underneath the house. Others utilize the space for additional storage. This foundation is effective for multiple soils, but not all climates.
Full Basement
A full basement provides you with 7-foot or taller ceilings—commonly 7 feet tall or more—so you can add additional living rooms, storage space, or even a home office. This can increase your home’s value and attractiveness. It’s more expensive — averaging $34,250 — but it can pay off in the long run if you require more room.
Basements require proper waterproofing and drainage to prevent leaks or dampness. You can use ICFs to achieve the best of both worlds — strong walls and enhanced energy efficiency. If you go with this type, you gain flexibility for future requirements or upgrades as well.
Benefits And Drawbacks Table
Foundation Type | Benefits | Drawbacks |
Slab-on-Grade | Low cost, fast build, simple design | Limited to stable soils, hard to repair, and low access |
Crawl Space | Access to utilities, dry floors | Needs moisture control, limited height |
Full Basement | Extra space, high value, flexible | Most expensive, needs waterproofing, complex build |
Proactive Foundation Care
A premium concrete foundation is the spine of your real estate, but it requires care. Proactive care is the key to long-term stability and cost savings.
Regular Inspections
Regular checks catch problems early, like tiny cracks or sloping floors. Early detection means you escape larger, more expensive repairs down the road.
Log what you discover in your checks. Recording wall cracks, sticking doors, or shifts in floor level allows you to identify patterns and take action before it’s too late.
Partner with foundation pros when you observe red flags. Their experience provides insight into how soils behave in your area and identifies issues specific to your property.
Water Management
Water is a primary culprit of foundation issues. Proper drainage, such as French drains or strategically placed gutters, ensures that water stands at least 2 meters away from the foundation. This prevents soil from moving as it becomes wet or dry, which can stress your foundation.
Examine your land’s slope. The earth should direct water away from, not towards, your home. Modifying the slope, or grading, is easy but crucial.
Basement and crawl space waterproofing issues, particularly prevalent in regions that experience heavy rainfall or snowfall. Sealants or vapor barriers can be applied to keep out moisture.
Watch the weather. This preparedness for heavy rain or snow means you can move quickly and safeguard your foundation.
Landscape Control
Good landscaping promotes foundation health. Apply ground covers or mulch to prevent soil erosion immediately adjacent to your foundation. Stay clear of aggressive groundworks that disrupt the dirt directly beside the foundation.
Select trees or shrubs that have shallow roots. Deep roots can break up or lift concrete, causing uneven floors and cracks.
- Moist, but not soaked, soil near the foundation is important.
- Trim plant roots that creep too close.
- Don’t plant large trees closer than 3 metres to the building.
- Remove leaves and debris from gutters often.
- Apply mulch to assist in regulating soil moisture and erosion.
Keep up with regular care. Prune frequently, inspect the soil, and contain growth to defend long-term.
Maintenance Checklist
Look for wall fissures, slanting floor, jammed doors, and windows.
Ensure gutters and/or downspouts direct water 2 meters away from the foundation.
Maintain a record of when you seal or waterproof surfaces.
Shovel snow away from a 0.6-meter perimeter around the foundation.
Conclusion
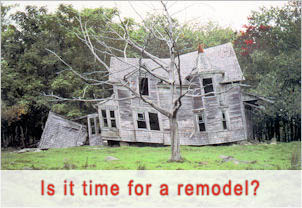
You prevent cracks and leaks, you maintain low costs, and your building remains safe for years. Shortchange the base, and you deal with repairs that devour your time and your budget. Consider premium concrete as an easy solution to prevent major migraines later. You recognize the value in every level slab and waterproof barrier. You provide your space the best launch, and you lay a foundation of trust with each renter or buyer who enters. For your next construction or remodel, choose a concrete foundation. Contact professionals who care about the craft and will make your property stand the test of time. Your step determines the destiny of your floor.
Want to reduce energy bills and increase home comfort year-round? Trust Mares & Dow Construction & Skylights Inc. to build or retrofit your concrete foundation with energy efficiency in mind. Contact us today to get started on a smarter, stronger home foundation built to last.
Frequently Asked Questions
1. Why Is A High-Quality Concrete Foundation Important For Property Owners?
It safeguards your investment against structural issues and minimizes repair expenses down the road.
2. What Makes A Concrete Foundation “High Quality”?
A high-quality foundation combines quality materials, appropriate design, and expert installation. It resists cracking, water damage, and uneven settling, keeping your property safe and secure.
3. What Risks Do You Face If You Cut Corners With Your Foundation?
Cheap work invites cracks, uneven floors, and water leaks. These issues can drain your wallet and deflate your property value over time.
4. How Does A Poor Foundation Affect Your Property’s Value?
A shaky foundation can generate both overt damage and covert problems. This turns your property into more difficult to sell and can lead to low-ball offers or costly fixes for buyers.
5. What Types Of Foundations Are Commonly Used, And Why?
The three most common types are slab, crawl space, and basement foundations. Each type addresses various soil, climate, and construction requirements, assisting in safeguarding your property’s integrity.
6. How Can You Maintain Your Foundation Over Time?
Monitor your foundation for cracks, address them promptly, divert water, and hire experts for repairs. Taking care of things before they become an issue keeps you away from big-time trouble and expensive damage.
7. Does Investing In A Better Foundation Save Money In The Long Run?
Yes. Your investment in quality materials and construction now avoids costly repairs, safeguards your property’s value, and delivers peace of mind for years to come.
Build A Strong Foundation With Mares & Dow Construction & Skylights – Concrete Expertise You Can Count On
A solid foundation is the backbone of any structure. At Mares & Dow Construction & Skylights, we bring over 40 years of construction experience to every concrete foundation project, delivering long-lasting, high-quality results that support your home or addition for decades to come.
Whether you’re building a new home, planning an addition, or replacing an aging foundation, our team specializes in residential concrete foundation services tailored to meet your project’s structural needs and design goals.
Why Choose Mares & Dow For Your Concrete Foundation?
• Precision-formed foundations built for strength and stability
• Seamless integration with custom home builds, remodels, or ADUs
• Expert site preparation and grading to prevent future settling or cracking
• Timely project delivery with clear communication from start to finish
Proudly serving Contra Costa County, including Alamo, Danville, Orinda, Martinez, and San Ramon, Mares & Dow Construction & Skylights is your trusted partner for dependable, code-compliant foundation work.
Contact Mares & Dow Construction & Skylights today for a free, no-obligation estimate, and start your project on solid ground.
Disclaimer
The materials available on this website are for informational and educational purposes only and are not intended to provide construction, legal, or professional advice. You should consult with a qualified general contractor or industry professional for advice concerning any specific construction project, remodeling plan, or structural concern. Do not act or refrain from acting based on any content included on this site without seeking appropriate professional guidance. The information presented on this website may not reflect the most current building codes, regulations, or industry best practices. No action should be taken in reliance on the information on this website. We disclaim all liability for actions taken or not taken based on any or all of the contents of this site to the fullest extent permitted by law.


 based on